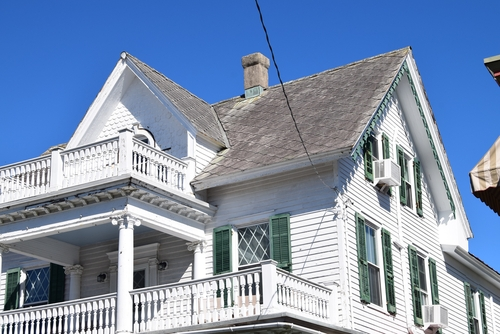
You will never take a fully functioning home for granted again after restoring a historic home. Much like Tom Hanks’ character in the 1986 film “The Money Pit,” you are in for an adventure. (And you need all the help you can get.)
Before you throw all your money at a whole-home renovation, consider taking a few essential steps that will pay off over the long haul.
1. Rewire the House
For a home built in the 1960s or before, first have the electrical wiring inspected by an experienced professional. They may discover old knob-and-tube or aluminum wiring components that need to be replaced. Other indicators that rewiring should happen ASAP? You smell something burning or notice discolored outlets or switches.
If any other major renovations are in store, such as installing sheetrock or a new HVAC system, it’s definitely a good idea to rewire the house first. The average cost to wire a new house is $8,000-15,000. This is because contractors often have to bring everything touching that project up to building codes, so rewiring the whole house at once may save you money in the long run. Also, you’ll only need to patch drywall once, saving time as well as money. You’re not alone if you don’t know how to rewire a house. It’s best to hire a pro for this job.
2. Conduct a Home Energy Audit
No one likes the word “audit.” But trust us, when it comes to your home’s energy, an audit is a good thing. It will help you determine what areas of your home need the most attention when it comes to sealing and insulating holes that leak energy.
Conducting a home energy audit — also called a home energy assessment — is one of the top tasks recommended by the U.S. Department of Energy. You can hire a professional to use tools such as blower doors, infrared cameras, surface thermometers and the like to determine the biggest sources of energy loss. Or you can conduct your own DIY checklist to see where air might be leaking out of windows or doors.
3. Repair or Replace the Roof
Securing the perimeter of your home starts with the roof. It’s easy to forget what you can’t see everyday, but your roof is your first defense against the snow, rain, sun and wind that pummels your home. Curling or missing shingles, shingle granules in the gutters, or daylight showing through roof boards are sure signs that nature is trying to take your home back.
4. Upgrade Existing Heating and Air Conditioning
Imagine enduring your very first tiling project with sweat dripping into your eyes because it’s too hot in the house but your fingers are caked with grout so you can’t wipe your face. Yes, it sounds terrible. Avoid making every house project your worst nightmare by first upgrading your existing HVAC to save money and make your home more comfortable.
According to the U.S. Department of Energy, modern heating systems can achieve 98.5 percent efficiency, which translates to substantial savings in utility costs as well as carbon dioxide emissions.
5. Restore Original Woodwork
Before you replace everything outdated, take a good look around the interior of your home for any original wood flooring, trim or moulding. Rather than replace everything with newer materials, consider that older wood has a tighter ring count, making it stronger and more rot-resistant than newer varieties. Plus, the original woodwork helps to retain the historic character of the home.
When restoring an older home, the first steps are not the prettiest but they are essential. Rewiring, an energy audit, roof replacement, HVAC system and restoring old wood are all perfect places to start.


